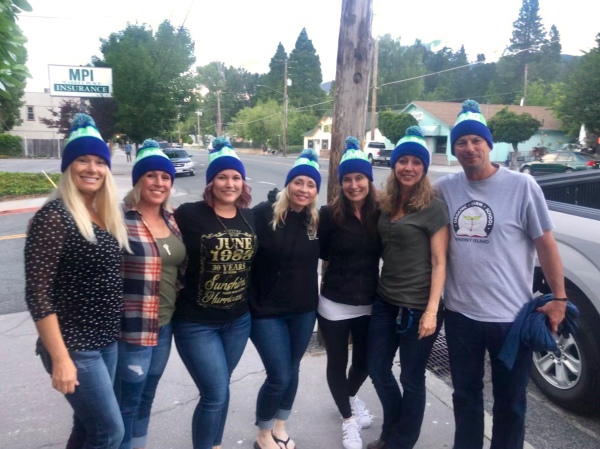
Two Teams Summit Mt. Baker!

Baker 1, Team Olympus Construction, celebrates on the summit. Photo courtesy of Ryan Dahle.
Mt. Baker is one of those mountains you remember. It’s perched on the edge of what we call the pacific “rim of fire,” encompassing our west coast volcanoes. Mt. Baker rises up above the North Cascades, the Picket Range and the San Juan Islands. On a clear day, summit views include Washington, the Pacific Ocean and Canada. Many climbers seeing Mt. Baker for the first time come back time and again. Mountain climbing, a metaphor for recovering from illness, is one step at a time, one day at a time, one hour at a time.
The hike to Mt. Baker’s base camp on the Easton Glacier winds through meadows, wildflowers and creeks, before finally ascending the railroad grade, which is a rocky trail leading to Sandy Camp. The names that describe Mt. Baker’s features are inviting. You will climb alongside the steamy volcano crater before ascending the mountain’s Roman Wall. Once cresting this feature, a football sized flat top is crossed to the true summit at 10,781 feet.
Team Olympus Construction (Baker 1) traveled from their homes in Arizona, having raised thousands of dollars for life-saving research at Fred Hutch.

Climbers rest & practice snow skills. Photo courtesy of Ryan Dahle.
All members of this team are beyond impressive, in their dedication, training and commitment to saving lives.

Baker 2, Team Insight Global, on the summit. Photo courtesy of David Kendall.
Team Insight Global (Baker 2) included brand new climbers and climbers who summited Mt. Rainier with their Insight Global team two years ago. This amazing company chooses a new mountain annually to scale while continuing to raise money for pioneering researchers at Fred Hutch. Traveling from up and down the west coast, they arrived at their gear check at Alpine Ascents International, ready for their full mountaineering experience, having raised money in their communities and networks to save lives.
Corporate partnerships like these with Olympus Construction Management and Insight Global fuel private support at Fred Hutch.
For more than 40 years, Fred Hutchinson Cancer Research Center has been redefining what’s possible in cancer research. The Hutch’s work has already led to cures for some cancers. Our pioneering research in bone marrow transplantation to treat blood cancers was the first proof of concept for immunotherapy — a groundbreaking approach that harnesses the immune system to fight disease. Now we’re accelerating progress toward a future where cures are available for every patient.
“Our mantra is Cures Start Here. We’re not looking to simply treat cancer — we’re looking to cure cancer.” — Dr. Gary Gilliland, president and director
Mt. Rainier Summit – What I Didn’t Know Then
By Marina Rockinger, KOMO News radio, Seattle

KOMO’s Marina Rockinger on the summit of Mt. Rainier on July 21, 2019
Exactly 1 month ago today, I stood on the summit of Mt. Rainier (14,410 ft).
I climbed with the Climb to Fight Cancer, benefiting Fred Hutchinson Cancer Research Center.
I was climbing for my sister.
I was climbing for my mother-in-law.
But, what I didn’t know?
I was climbing for me.
Exactly ten days after I stood triumphantly on the sunny summit of Mt. Rainier, Washington state’s highpoint, I was diagnosed with breast cancer.
My sister, Trina, battled Non-Hodgkin’s lymphoma for eight years. She was told last Friday that she is in remission. When we heard this wonderful news, my husband and I fell into each other’s arms. We were each crying with visceral joy.
My mother-in-law, Marsha, is deep in her fight with pancreatic cancer. She is enduring months of chemotherapy, readying her body for a major surgery sometime this Fall.
I am now in that fight too. My climb, as it turns out, could not have been closer to a version of irony that I can think of.
Specifically, Invasive Lobular Carcinoma is in my left breast. It’s also in my lymph nodes.
During all the years (originally for only breast cancer) I’ve raised money to cure cancer faster at Fred Hutch, who knew I would ultimately be climbing for myself, too?
I believe everyone who has said to me, “you are strong. You will beat this.” I am and I will.
Also, I have a sick sense of humor, so I have decided I need a T-shirt that reads:
“I climbed Mt. Rainier, and all I got was this lousy t-shirt. And cancer.”
You can follow the inspiring, brave (and very funny) Marina Rockinger on our Twitter and Facebook pages. We will be sharing her posts and progress, as she shares publicly. Marina has climbed Mts. Baker (twice), Hood, Shasta and Rainier with the Climb to Fight Cancer. She also served on the Climb to Fight Cancer Committee.

Marina Rockinger (fifth from right) and her Climb to Fight Cancer team summiting Mt. Rainier
by Denise Whitaker | KOMO News Friday, August 16th 2019
Imagine hiking at an altitude of 17,000 to 18,000 feet for hours.
You’re exhausted walking back to camp, but then you’re greeted with 100 or more people singing loudly. This is exactly how the guides, porters, cooks, and crew greeted 27 Climb to Fight Cancer climbers on Mt. Kilimanjaro each day they returned from the day’s trek.
Kristin Anderson, one of the climbers in that group, said the singing would go on and on and on, sometimes for 20 minutes, until every one of the 27 climbers in their group was back to camp and dancing along with them.
“You can’t convey how much energy they bring back to you after six to eight hours of hiking when you are exhausted and can’t breathe and everything hurts,” said Anderson.
Anderson is one of 27 bio-tech professionals who went on this climb, every one of them making the summit. A feat rarely seen on Kili.
Anderson said it was so hard, she almost didn’t make it.
“So, I am seven-eighths of the way there and I am this close to giving up because I can’t breathe. It’s just so hard and I am so tired. We have been hiking in the dark up a mountain for six hours and it’s freezing. I can’t feel my toes. I can’t feel my fingers,” she said.
That’s when Anderson said one of the guides picked her up in a bear hug and held her.
“And she just held me for about four minutes until I caught my breath. She said, ‘You have come so far, you are so close, just breathe.’ And then we kept going, and literally in that moment, that’s what kept me going,” said Anderson.
That story mirrors an earlier period in Anderson’s life, when at 28, she was diagnosed with triple-negative breast cancer.
“I remember falling to the floor in tears just so upset,” she said.
But a huge support network of family and friends picked her up.
“I don’t think we cooked for like eight months because every single day someone brought us dinner,” said Anderson.
When treatment robbed her of her hair, she received two wigs. Her husband, Justin Taylor, modeled one with her and that photo of the couple together in wigs — Anderson said it is still one of her favorites.
And her best friend, Joyce, who’d already been through cancer treatment, immediately stepped up to help.
“She emailed me right away and she said, ‘Oh my God, I have all these things that are going to make your life so much better.’ And it was just little things that I never would have thought of,” said Anderson.

Dr. Kristin Anderson and her best friend, Joyce
When Anderson joined this Climb to Fight Cancer Team, Joyce was right there supporting her again with a donation, helping Anderson and her team raise more than $1.5 million for cancer research.
Anderson’s family was right there with her, too. Aunts and relatives started telling her that they too had cancer. One aunt even forwarded all her medical records to Anderson’s doctor to help with her treatment.
“So, they knew what mutation to look for, and so I had genetic testing that they found out I had the same [BRCA mutation], and ever since all my cousins have been tested to find out so they can basically be proactive,” said Anderson.
Originally planning to complete her doctorate and move on to research vaccines, Anderson shifted her focus after her diagnosis to cancer research. She’s now a scientist at Fred Hutchinson Cancer Research Center in Seattle, studying T-cell therapies.
“We’ve had tons of success with this in blood cancers, like leukemia, and now we’re working to make it work in solid tumors like ovarian cancer, pancreas cancer, lung cancer, some of the ones that we really need additional therapeutic options for,” said Anderson.
This is why Anderson, who’d never climbed a mountain before, joined the Climb to Fight Cancer team, to help keep all kinds of cancer research moving forward. Collectively, the team raised more than $1.5 million to fund research, just like Anderson’s.
“I already have four friends who are under 30 who have had either breast or ovarian cancers,” she said.

Dr. Kristin Anderson in treatment for breast cancer
Reflecting on her two difficult journeys, Anderson did find some similarities.
“There were parallels that I found between my cancer journey and my mountain climb. One of the biggest ones was the fact that my cancer journey was unique like everyone’s is, and in mountain climbing everyone’s journey is unique. No two people have the same altitude sickness issues at the same point on the mountain and everyone brings with it different experience, so I see that to be very similar,” she said.
Anderson said both can be very isolating and lonely, yet also uplifting with those who come to your rescue.
“When I was going through cancer, like I mentioned, people came out from everywhere to help and support me. It felt like that on the mountain, too,” said Anderson.
“And every time I struggled on the mountain, I thought about my friends who were going through treatment now or who were struggling with their disease,” said Anderson.
That includes her best friend Joyce.
“She was actually in hospice and passed away the day that I was summiting the mountain, and I didn’t find out until I got down. I was very sad that I hadn’t gotten a chance to say goodbye. She knew the value of what we were doing,” Anderson said, wiping tears from her face.
“She was amazing and I miss her so much.”

Dr. Kristin Anderson (front row, second from left) with the entire Kilimanjaro team
So Many Gifts ~ Mt Shasta SUMMIT
“This is as close to my heart and as much of my life’s passion as almost anything else.” ~ Tiffany Locker, volunteer mountain climber

Our 3-day climb itinerary up the West Face route on Mt. Shasta (14,179 ft) began the day prior, joining for a traditional team dinner and celebrating a team member’s birthday. Four of us drove from the south and three flew in from the north to meet at Mike & Tony’s restaurant for dinner in beautiful downtown Mt. Shasta, CA. Friendships grew out of the dichotomy of emotions that evening as we savored fabulous Italian cuisine
together. Climbing connections are a beautiful gift, as the Climb to Fight Cancer attracts the most delightful people. After a night far too adrenaline-filled for sleep, we met our professional guides with Shasta Mountain Guides Friday morning behind The Fifth Season gear shop for the ever-important gear check. Equipment choices were made and alternate gear rentals were arranged. We hit a grocery store for some last minute snack fuel before heading to the trailhead.

There’s always a special, bustling energy when taking off on a climbing expedition. There are so many feels and so many unknowns. I’ve personally learned that the only way to mitigate my nerves is to simply embrace them. Learning a new sport is, to say the least, an intimidating prospect and certainly, approaching a hulking mass of a mountain with 45 pounds strapped to your back is daunting, no matter how many times you’ve done it. Who will carry the conversation or pull ahead on the hike pales in comparison to how your shoulders begin to feel as your pack digs into them, or how your feet feel in your mountaineering boots after the first few miles. Being mindful of the Climb’s purpose, the pleasure and the pain are both gifts.
We departed the Bunny Flat trailhead (6,950 ft), worked our way towards historic Horse Camp (8,000 ft) and filled our water bottles from its cold natural springs. Taking hourly breaks and moving well as a unit, we traversed around Casaval Ridge before climbing up into Hidden Valley (9,200 ft), our base camp for the next two nights. Hidden Valley makes for a long summit climb the following day (5,000 ft elevation gain) but it is the perfect campsite on the West Face. Upon our arrival, we set up accommodations and proceeded through “snow school,” learning the skills we would need to climb the mountain the following day. It was apparent we had been gifted with both an idyllic forecast and great conditions for the weekend. We were thankful.

Summit day began with an alpine start, my very favorite time on a mountain. I adore the crunch of crampons as they gnaw into the snow against the deafening silence of nightfall. Headlamps beneath a pristine night sky illuminate a magical debut to a crisp composition of early morning senses. The rosy pink sunrise soon greeted us and brought the sun’s warmth with it, a welcomed relief from the biting temps and chilly breeze. We slogged our way up the West Face, eventually reaching the Saddle (13,330 ft), a welcome change of scenery and a perfect place to take a break before the summit push. The final portion of the route is appropriately named Misery Hill (13,800 ft), as alpine climbing often brings an element of suffering with it, this stretch being no exception. A diligent pursuit brings both the Summit Plateau and the Summit Pinnacle (14,179 ft) just beyond it, treasured gifts for weary climbers to be sure.
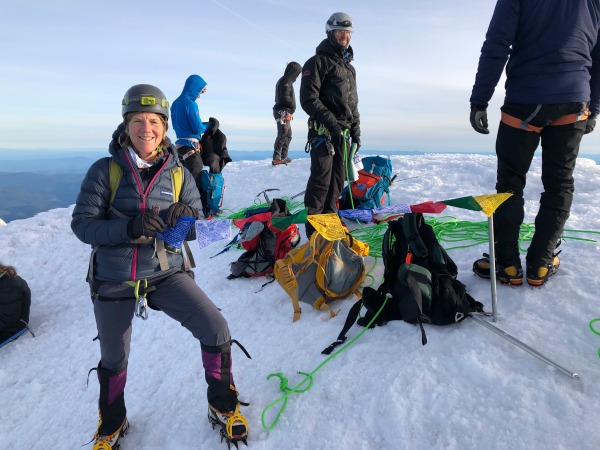
The summit is a precarious culmination of efforts and emotions. As a team, six of us raised nearly $25,000 for cancer research before setting foot on the mountain. At the summit, climbers take pause to honor friends and loved ones who’ve won or lost their cancer battle with banners, prayer flags, pictures and mementos. It’s in those moments, reaching the metaphorical summit of your own heart and having achieved your personal best, that gratitude is felt everywhere.
After taking in the sights, capturing the photos, and signing the registry, our down climb began. Descending the West Face mandates roping back up because even while being expertly guided, a 30-degree downward pitch demands sure footing and laser focus, both of which are tempted to wane after such a long summit day. Once it was safe to do so, glissading techniques were reviewed and implemented, making for a sweet, swift ride down the snowfield, a gift in and of itself. We returned to Hidden Valley after a 16-hour day just in time to devour dinner and appreciate a good night’s rest. The following morning included a leisurely breakfast, packing up camp and hiking out.
Long after the blisters have healed and muscle groups have recovered, climbers are left with life-long gifts. Learning to lean headlong into the challenge of assisting Fred Hutch and the Climb to Fight Cancer who have successfully raised over $9 million since their inception in 1997 is a gift. Learning to do hard things while embracing primal pleasures is a gift. Each time I climb, the mountain has met me where I am in life and has taught me what I’m willing and able to learn. For me, the best governor towards the implementation of gratitude in life is conducting myself with reciprocity, which is perhaps, my life’s greatest gift of all.


~ By Tiffany Locker
Editors note: Tiffany has summited mountains six times for the Climb to Fight Cancer. Her climbs include Mts Hood, Baker, Rainier and Shasta. She’s raised thousands of dollars for lifesaving research at Fred Hutch. Thank you Tiffany, we are grateful for you and the whole Mt. Shasta team.

All photos courtesy of the Mt. Shasta Climb to Fight Cancer team.
Mt. Hood SUMMIT

Mt. Hood 2019 on the summit (11,239 ft)
Mt. Hood team SUMMITS!
Oregon’s Mt. Hood is a mountain close to our hearts and important to our Climb to Fight Cancer program. Each June, our teams on Mt. Hood gather to kick off the Climb to Fight Cancer season and honor friends, colleagues, family members and anyone afflicted with cancer. This year’s group included participants and guides closely touched by this disease. All proceeds benefit research at Fred Hutchinson Cancer Research Center in Seattle.
Marybeth Dingledy, a BRCA 2 gene carrier and breast cancer survivor, assembled a team to climb the mountain’s flanks and Mike Leum, with the Los Angeles Sheriff’s office, also assembled a team. Climber Adam Fain returned with colleagues, along with Committee members, first time climbers and seasoned mountaineers. Many of these dedicated individuals and their amazing teammates have come back to Mt. Hood over many years to continue to raise funds for life-saving research at Fred Hutch.

Climbers John Rodarte and Mike Leum of the Los Angeles County Sheriff’s office,
This year’s team enjoyed pristine weather and outstanding snow conditions. Climbers successfully participated in “snow school” expertly lead by Timberline Mountain Guides. They learned the footwork, rope work, and team work needed to safely and successfully ascend the mountain before summit day.

Mt. Hood Hogsback. Photo courtesy of John Rodarte.
The team departed from historic Silcox Hut (7,000 ft) under moonlight and their head lamps. They climbed through the darkness and witnessed dawn’s first light at the Mt. Hood Hogsback (10,500 ft). This is a comfortable area to rest before the last ascent. The skies are pink with anticipation of the coming sunrise. It’s a time to dig deep, reflect on those we are climbing for, and gather the strength needed for the final climb.
Climber Betsy Cadwallader on the summit!
Timberline Mountain Guides lead guide Cliff Agocs lead the team up the final ascent and into the sunlight. Team members celebrated, took photos, and gathered as a team. They carry prayer flags to honor the reasons they climb.

Longtime climber and supporter Adam Fain feeling good on the mountain.
Thank you to each team member for raising thousands of dollars to fund pioneering, cutting-edge research at Fred Hutch. Thank you to each donor, survivor, family member and company supporting these efforts. Climbers train, fundraise and plan for months before participating in these expeditions. This team travelled from as far as North Carolina to join together for the goal of funding a cure. Thank you all.
For more photos of this beautiful climb, please visit our SmugMug gallery.

Climber John Prillaman on the summit!

John Rodarte and Mike Leum on the final ascent.
KILIMANJARO SUMMIT!
 Trip report by Climb to Fight Cancer climber Jeff Fryer
Following an extraordinary trek to Mt. Everest Base Camp in Nepal as part of the Climb to Fight Cancer, benefitting Fred Hutchinson Cancer Research Center, I eagerly anticipated another adventure. On January 8, I departed Arusha, Tanzania with Alpine Ascents International (AAI) to tackle and hopefully summit, Uhuru Peak in Kilimanjaro National Park – otherwise known as Mt. Kilimanjaro, the highest point in Africa at 19,341 feet and one of the “Seven Summits.”
It was extremely important to me to do this with the Climb to Fight Cancer. I lost both of my brothers and my father to cancer. As a result, I felt a desire to do something to help eradicate this horrific disease. This is what called me to join the Everest Base Camp team last year and fueled my desire to continue to meld my love of backpacking, hiking and trekking with an opportunity to raise critical dollars for cancer research.
Our trek began at the Machame Gate at the base of Mt. Kilimanjaro. Climbing through the Cloud Forest (or the Rainforest Zone) was surreal, culminating with a well-earned rest at Machame Hut camp. Day two we hiked higher, through the Heather and Moorland Zone, to Shira Caves camp. Days three, four and five we traversed the mountain through the Highland Desert Zone, with a brief overnight stay at Kosovo camp in preparation for summit day. Summit day was on day six, Sunday, January 13, 2019.
We were unable to actually see our goal until halfway through day five. Mt. Kilimanjaro had been “socked in” with a stubborn weather pattern for two weeks. Fortunately, the clouds briefly lifted in the afternoon of day five and we were excitedly able to view our ascent route.

On summit day, we left Kosovo camp at midnight and slowly worked our way toward the roof of Africa. Watching the sunrise was breathtaking. It was sheer beauty and magnificence.
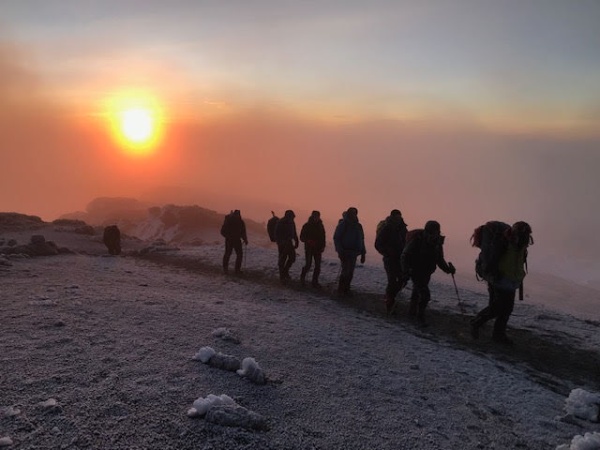
Fourteen of the fifteen climbers successfully summited by 7:00 a.m. Woo hoo!

The blessings I have been so fortunate to receive through these experiences are immeasurable. Hiking through the Khumbu Valley, spending two nights at Mt. Everest Base Camp and summiting Mt. Kilimanjaro were adventures that weren’t even on my bucket list. Next up . . . Aconcagua!
Blessings do, indeed, abound, you simply need to look around . . .Jeff Fryer.
All photos courtesy of Jeff Fryer.

The Volcanoes of Mexico – Two Summits!
By Chris Kesler, Lydig Construction

Dustin Shelton and Chris Kesler raising a banner for cancer research on the summit of Itza, the 7th highest mountain in North America at 17,159 feet.
When I first considered this expedition one of my thoughts was, do I really want to travel five hours on a plane to another country to find out if I can successfully climb at high altitude? Is this a realistic climbing and fundraising goal?
How was I to face my fear and uncertainty of attaining summits above my previous mountaineering experience? I settled this internal struggle when I remembered that this is exactly why I climb for Fred Hutch. I choose to push myself for people cancer has given no choice. Friends, family members and colleagues with cancer climb physical and emotional mountains they haven’t chosen. I choose to help fund life-saving research and the innovative scientists at the Hutch. With this realization, I decided to extend myself far beyond my comfort zone.
The Volcanoes expedition includes ten days in beautiful Mexico – two travel days, six days of climbing, and a couple of days of inter-country traveling with cultural experiences. Pretty straight forward, right? It was so much more.
Soon after arriving in Mexico City all nine climbers exploded the gear bags on the lawn of our hotel for our mandatory gear check with our two Alpine Ascents International guides, Stuart Robertson and Dylan Cembalski. Both Stuart and Dylan have guided many Climb to Fight Cancer expeditions. Our group’s ages ranged from 29 to 59. This gear check meeting began the bonding of our shared experience. Once we commenced we were joined by Arnoldo, a Mexico City native who would be our local tour guide, van driver, storyteller, legend interpreter and man of history.
Prior to attempting our first climb on Iztaccihuatl “Itza,” the seventh highest mountain in North America, we spent time visiting the Museum of Anthropology, then driving to a remote area as we acclimated to the increasing altitude. On day three we did an acclimatization hike to elevations of 12,000 – 14,000 feet. This was finally my chance to see how I felt being at the equivalent of the summit of Mt. Rainier, my mountaineering elevation high point to date. The following day we donned full backpacks and began our climb of Itza in earnest. It was a big but manageable day and we reached our high camp of 15,000 feet. We were treated to an unbelievable sunset and spent the evening telling stories.  I was filled with excitement and if I’m honest a little apprehension for what was ahead. I was trying to sleep, manage a slight headache and thinking about what I’d eat. The night before any climb can keep a mind racing, and I was nervous about how I’d do at these higher elevations. Could I really climb to over 17,000 feet?
In the pitch black darkness of the early morning we begin our ascent. The rhythm of my breathing settled me. As the morning awakened, we could see our objective. We slowly completed the final push up the spine of the mountain and before long I was standing with my teammates on the summit of Iztaccihuatl at 17,159 feet, my new elevation high point. The air was crisp, the skies clear, and the feeling rewarding. After a short time we descended, packed up camp, and made the long trip to Puebla, Mexico. The warm food, drink and hot shower were all greatly appreciated.
The time spent in Cholula (yes, the home of the hot sauce!) and Puebla was awesome. We visited some of the oldest sites in the Americas including pyramids, libraries, cathedrals and many other historical landmarks. It was serendipitous for sure. We left this beautiful area and headed to the solitude of the slopes of Orizaba, our second objective.
We drove to the Orizaba mountain guides facility. We were treated to a delicious lunch and we loaded our gear into 4×4’s. Nearly two hours later we were above the tree line and in the sage brush decorating the flanks of one very big volcano. This was our base camp – Piedra Grande at 13,800 feet. Our camp had a cooking hut and a separate group eating tent. We spent the balance of the day hanging out together. We slept late the following morning and eventually geared up for another acclimatization hike. We worked our way up to somewhere near 16,000 feet while enjoying the rugged beauty of the moraine we were traversing.
All too quickly we headed back to our camp and the anticipation of our upcoming summit attempt in the pre-dawn hours filled my head. The time period from my oatmeal and cider, to packing up and leaving camp is still suspended in time for me. We spent hours in the dark sky, our crampons crunching the firm snow, our head lamps bobbing, the sounds of our steady, deep breathing, and the comforting cadence of climbing. I felt like I belonged there. We roped up as we came onto a massive snow field. We were sensing the first signs of light. This is always the coldest time on any mountain.
The sun brings out the magic of the alpine environment. The peaking of the first light, the silhouettes of other climbers become visible, and ultimately the shadow the volcano casts itself over the landscape below. It never gets old. Three+ hours on the ice and I was even more focused on breathing and maintaining a solid rhythm.
We reached the crater rim bathed in full sunlight. The summit was thirty minutes away via a ridge walk toward what appeared to be an endless blue sky. Along with my teammates I absorbed all the doubt and fear that had lived in the back of my brain for months. I was climbing for those I love and for those I have never met. I was actually doing it.
The hugs and handshakes were satisfying, but nothing compares to the feeling of doing something bigger than myself. As my friend Kelly says, “Love them all, let their spirits flow.” As I crested the summit of the third highest peak in North America, I did.
We are filled with so much gratitude for these two summits and the journey that brought us here.
Thank you.
Chris Kesler.

Volunteer, climber, fundraiser, blog author and explorer Chris Kesler takes in the view.
My crux
In mountaineering, the crux is the most difficult section of a route. This is why I train.
In cancer research the crux is the most difficult obstacle to overcome that leads to a breakthrough, or the place where the greatest viability lives. This is why I climb.
In planning a route, it is important to know how far it is before the crux is reached, because cruxes can only be overcome with sufficient reserves of strength. This is why I train.
In traveling the path towards discovery, it is important to know how far it is before the crux is reached, because cruces can only be overcome with sufficient reserves that support where the trail leads…towards cures. This is why I climb.
The Roof of Africa ~ Mt. Kilimanjaro
 It’s impossible to spend time in East Africa and not be changed, even ever so slightly, for the better.
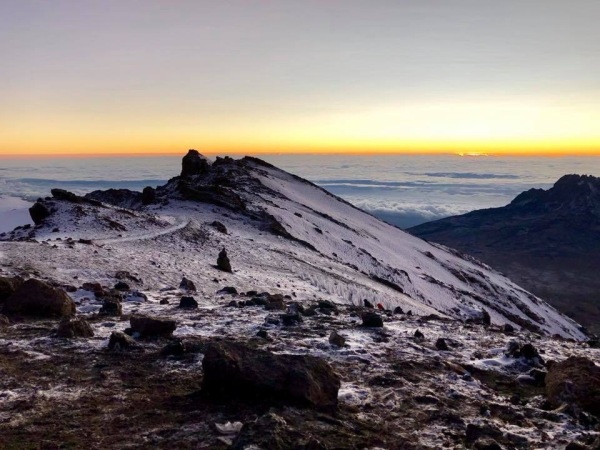
Mt. Kilimanjaro stands at 19,341 ft, the roof of Africa, cascading her shadow over the relatively flat fields, cities and villages of Tanzania. This land has everything – the loveliest people, scenery to steal your heart, and volcanoes to make your boots sing.
The Climb to Fight Cancer celebrated fifteen years on Mt. Kilimanjaro with this season’s climb there. Kilimanjaro was the first international and first big fundraising peak climbed by Fred Hutchinson Cancer Research Center volunteers. Since then, survivors, 7-summiters, families and philanthropic adventurists have ascended her flanks, raising life-saving dollars for cancer research.
As with most mountains, but especially this one, our daily ascent was planned one day at a time and as climbers, our focus was one hour, or one footstep, at a time. Those afflicted with cancer have described their treatment the same way, moving one day to the next, hoping for the best, nervous about what their next steps may bring. We had many friends and family members on our minds and hearts as we slowly ascended this peak for them.
 The photos of this magnificent corner of the world tell the story better than any words ever could. If I had a paintbrush I would not be able to create the wild inviting colors stretched across the skies every morning and night. Even in the high elevations we awoke to birds and our porters singing in Swahili. Kilimanjaro takes seven days to climb and a lifetime to process.
Your donations, prayer flags and well wishes propelled us and fueled us. The Climb to Fight Cancer crested $9 million dollars in lifetime fundraising this year. Those dollars are funding lives saved, cures and hope. Thank you for taking these footsteps with us.
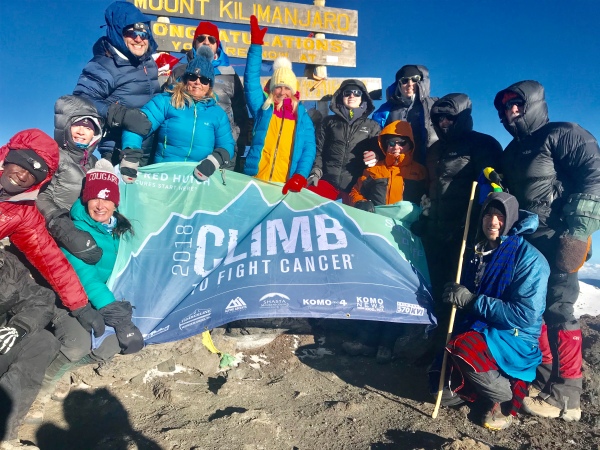
September 21, 2018 – SUMMIT of KILIMANJARO
Disappointment Cleaver Delivers – Mt. Rainier
 Mt. Rainier is a special mountain no matter when you are on it, who you are with, or who is guiding you. No other peak in Washington state has strangers marvel to one another, “the mountain is out” when she shines any time of year. Lifelong Washingtonians and new residents alike never tire of her gaze.


This summer, three separate Climb to Fight Cancer teams, benefitting Fred Hutchinson Cancer Research Center, ascended Mt. Rainier in July and August with their hopes pinned on pioneering, innovative cancer research and a chance to touch the most coveted summit in the lower 48 states.
Climber Bill Brower, who climbed for pancreatic cancer research, writes ~ “As you can imagine the mountaineering community has no shortage of extraordinary people in it. My summit team consisted of an astrophysicist, orthopedic surgeon, recovered alcoholic who had destroyed his life dozens of times over, professional tri-athlete and professional marathon runner…the list goes on. We were brought to the same level, humbled by the scale of the mountain and the extraordinary challenge it throws at you. For me this challenge was focused on raising money and awareness for cancer and inspiring strength for those battling. This mountain has captivated me from moment I saw it and I am lucky enough to have it in my backyard. Back at home so quickly, you realize that the simplest things in your day are such a privilege…being warm, a soft place to sleep, running water and warm food. When you’re out there you tend to think about those things frequently but when you’re back you miss the visceral experience of not having them. The sounds of ice cracking and falling at night, echoing around you, the feel of cold fresh air, the feeling of squeezing on cold boots with raw feet and the intense focus on rest-stepping your way up higher and higher. This is certainly not for everyone and not for the faint of heart but for those who are hungry for something challenging this may be it…it’s magic.”


If you would like to test your hiking feet on Mt. Rainier next summer, while raising money science at Fred Hutch (donations stay at Fred Hutchinson Cancer Research Center), we would love to have you on our team. Dates include July 19-21, August 8-10 and August 14-16, 2019.
This year’s teams consisted of half men and half women and ages ranging from 15 years old to much older…


Thank you to all who participated for the awe-inspiring, remarkable season in the mountains.
Next up: Mt. Kilimanjaro September 13-27, 2018 and the Volcanoes of Mexico December 1-10, 2018


Climb a Mountain. Save a Life.

Twenty-Seven climbers SUMMIT MOUNT BAKER!
 Unsure of the time, only knowing it was getting lighter outside, I laid in my tent waiting for the alarm to go off. At 5:30am, I would start the day I’ve been excitedly preparing for since last year. As I waited for the alarm, I thought about the training we received the day before in snow school – how to walk in crampons, how to use the ice axe, how to execute a self-arrest. I mentally reviewed my pack inventory to make sure I had everything I needed and knew where it was. I was so thankful it would be considerably lighter than on the hike to basecamp the day before.
When my alarm finally went off, I was already out of my tent getting ready for the day. I’m glad I woke up early because I witnessed a beautiful sunrise and got to watch camp slowly come to life as climbers emerged from their tents to get ready. Our guides were already up and boiling water for coffee and getting breakfast ready. At breakfast, we got a recap of the plan discussed the night before. Group one would leave the Easton Glacier first, group two would then leave Crag View and our group (group three) would follow about a half-hour later. If all went to plan, we would all meet up on the summit around the same time.
 Once group 2 started to fade into the distance, our team began our summit bid. We decided that instead of hiking down and over to the Squak Glacier, we would climb up and over the rocks that separated it from camp. While this may sound simple, this was my first time climbing in mountaineer boots, which are rigid and unforgiving, and the rocks were sharp and unstable. This was Baker’s first challenge. With trepidation and determination, I slowly crossed the rocks repeating in my mind “don’t fall and hurt yourself 200 feet from camp!” Finally, I hopped off the rocks and onto the glacier.
On the glacier, we strapped on our crampons, got out our ice axes, and broke into three rope teams. For the next 4,600+ vertical feet, me, Rays (the guide), Weston, and Eric would be tied together; required to communicate and work together to ultimately be responsible for each other’s safety. We were instructed not to be more than 25 feet apart, to not step on the rope, and to remember snow school. With that, it was time to climb.
And climb we did. We climbed for hours. I learned that when you’re hiking in snow, it  can seem like you’re going nowhere quickly. With 25 feet of rope separating you from your teammates, you have a lot of time to think about how you’re going nowhere quickly. Thankfully, our guides were awesome. They broke up our ascent into hour chunks. Every hour on the dot, we would stop to rest, eat, and hydrate. After making sure we were all in good shape, we would put on the packs and continue to climb.
While climbing in the snow was tedious, Mt. Baker is one of the most amazing and beautiful places I’ve ever been in my life. Crevasses are everywhere, some just a foot wide, but deeper than you can see. Others are giant and help shape the mountain façade you see from sea-level. The views of Sherman Peak (false summit) and the surrounding ranges were breathtaking. The Sherman crater, where we took our final break before summiting, appeared to be alive and emitted a strong sulfur smell unlike anything I’ve seen.
 After leaving the crater, we headed to the Roman Wall. A section of the climb I’ve been worrying about since I began training. It just sounds intimidating. One foot in front of the other, we began to ascend. This was the final obstacle Mt. Baker had for us before the plateau to the summit. As we made our way up, a group was coming down. It was one of ours – they had all made it! We moved aside, perched on the Roman Wall, and congratulated them all as they passed. They returned words of encouragement. We began again and not 20-minutes later, we stepped aside for another group. It was group 2 and they had also all made it!
You can rightfully assume that after learning the two other groups had successfully summited, we were fired up to summit. We needed the morale boost, too. It was almost 2pm, the sun was beating down, and the snow was slushy. Our goal was in sight, this Roman Wall and these conditions were our crux. Again, we stepped back on the path and pushed forward.
Finally, after emerging over the wall, I saw the plateau and the bald top of the summit. Just a few hundred yards away was the geographic point I’ve been thinking about since last year. The spot I told my family, friends, colleagues, clients, and anyone who’d listen, I would stand on and wave a banner for Fred Hutch. Even though my legs were tired, my pace quickened. Up one last hill and we were there. We dropped our packs and celebrated. I opened mine and pulled out the Climb to Fight Cancer banner and prepared it to wave where it belonged, at the top of a mountain.
 After the team photos were done, we ate quietly and took in the breathtaking views. I looked at the personal flag I brought with me and thought about my friends and family who have fought cancer and succeeded, and I thought about my friends and family who fought and did not succeed. A bit overwhelmed with emotion, I found solace in the hope that my small contribution to this team effort to help the Hutch would help save more lives.
After about 30 minutes, it was time to pack up and head back down to basecamp to camp for the night. We had about 5 more hours of climbing ahead and the promise of camp stove macaroni and cheese waiting for us. When we finally got there and recovered from the climb, we celebrated with our teammates. The atmosphere was jubilant knowing we achieved our goals – 27 successful summits and over $133,000 raised for life-saving research at Fred Hutchinson Cancer Research Center. After sharing stories and seeing photos of the day, we all turned in early. After an entire day of climbing, we all slept great that night.
– By Bill Michie, Lydig Construction
Editor’s Note – THANK YOU Lydig Construction. Over two mountain climbs (Mt. Adams 2012 and Mt. Baker 2018) you have raised $250,000 for breakthrough, pioneering research at Fred Hutch. You have our heartfelt gratitude.
Photos by Kevin Smith and courtesy of Bill Michie.


